iMotiv

Showing posts with label cooking. Show all posts

Monday, 7 July 2014

Crab Bee Hoon

Have been trying out new recipes recently and I made Crab Bee Hoon yesterday!
Think I am very bored with the food that I have been eating on a daily basis.
Googled online for this recipe and it was really easy to cook!
 
Personally, I always go for the simplest recipes. This recipe is from Rasa Malaysia.
 
Ingredients:
6 oz Guilin rice noodles (dry)
4 tablespoons melted unsalted butter
6 slices peeled ginger
1 cup canned chicken broth
2 cups water
1/2 cup evaporated milk
2 lb crab, cleaned and cut into pieces
5 baby bok choy, cut lengthwise into halves
1 tablespoon rice wine
1/2 tablespoon fish sauce or to taste (or salt to taste)
3 dashes white pepper
1 stalk scallion, cut into 1-inch lengths

Method:
Boil the dry Guilin rice noodles per the package instructions until al dente. Rinse the noodles with cold running water to remove the starch of the noodles (the noodles should be smooth and clean of starch after rinsing). Drain the noodles dry and set aside.
In a pot, add the butter and saute the ginger. Add the chicken broth and water and bring it to boil. Add the evaporated milk and follow by the crab. Cook for a few minutes until the crab turns red and cooked. Add the baby bok choy, rice wine, fish sauce, white pepper, scallion, and the noodles. Bring it to a quick boil and serve immediately.

Cook’s Note:
Add 2 more tablespoons of evaporated milk if you like your crab bee hoon creamier.
 
I got the crabs from NTUC and Cheewee had the honor of prepping the crabs. It was his first time and I must say that he did a pretty good job. He watched a youtube video before he started. It was not easy to kill a crab. Chopsticks were sacrificed in the process. While he was dealing with the crabs, I got started with the soup base and noodles.
 
I followed the recipe quite closely only excluding the bok choy and scallion. I also doubled the amount for the soup as my family loves soup. The soup will be perfect with more ginger, fish sauce and rice wine! I'm pretty amazed at how simple this recipe is and it tastes wonderful. Cheewee and my mum love it :D Feeling happy!
 
The soup looks very yellow due to the butter on the surface. Not sure if it's because there's too much butter. I also wonder if the soup will still taste as good with reduced butter. It's good but looking at the ingredients, it's super unhealthy :X


Sunday, 20 April 2014

Korean Army Stew

We ran out of ideas on what to have for dinner so we decided to cook something. Something easy to make and doesn't require alot of preparation. We decided on Korean army stew as it looks really simple to make and it kind of does not require proper cooking skills.

I used a random recipe that I found online. The recipe actually mentioned that I can add practically anything that I want. I added SPAM, sausages, toufu, mushrooms, minced beef, kimchi, rice cakes and cheese. I should have added cabbage and onions too. Used alittle too much chicken stock so it was alittle too salty. Will add more water instead the next time. It was surprisingly good! Easy to make and all we had to do was to add the ingredients into the pot and let it cook. This pot was too much for the 2 of us so I packed some for lunch tomorrow. Ahhh.. the cheese was really good in the stew. We wanted to add ramen but realised that we do not have any stomach space left for that. Minced beef was marinated with paste, sesame oil and white pepper. Paste for the soup was the paste, garlic powder and sesame oil. I think that the most important ingredient in the stew is KIMCHI. It will not taste as good without the kimchi!


End product without the cheese.

Sunday, 19 January 2014

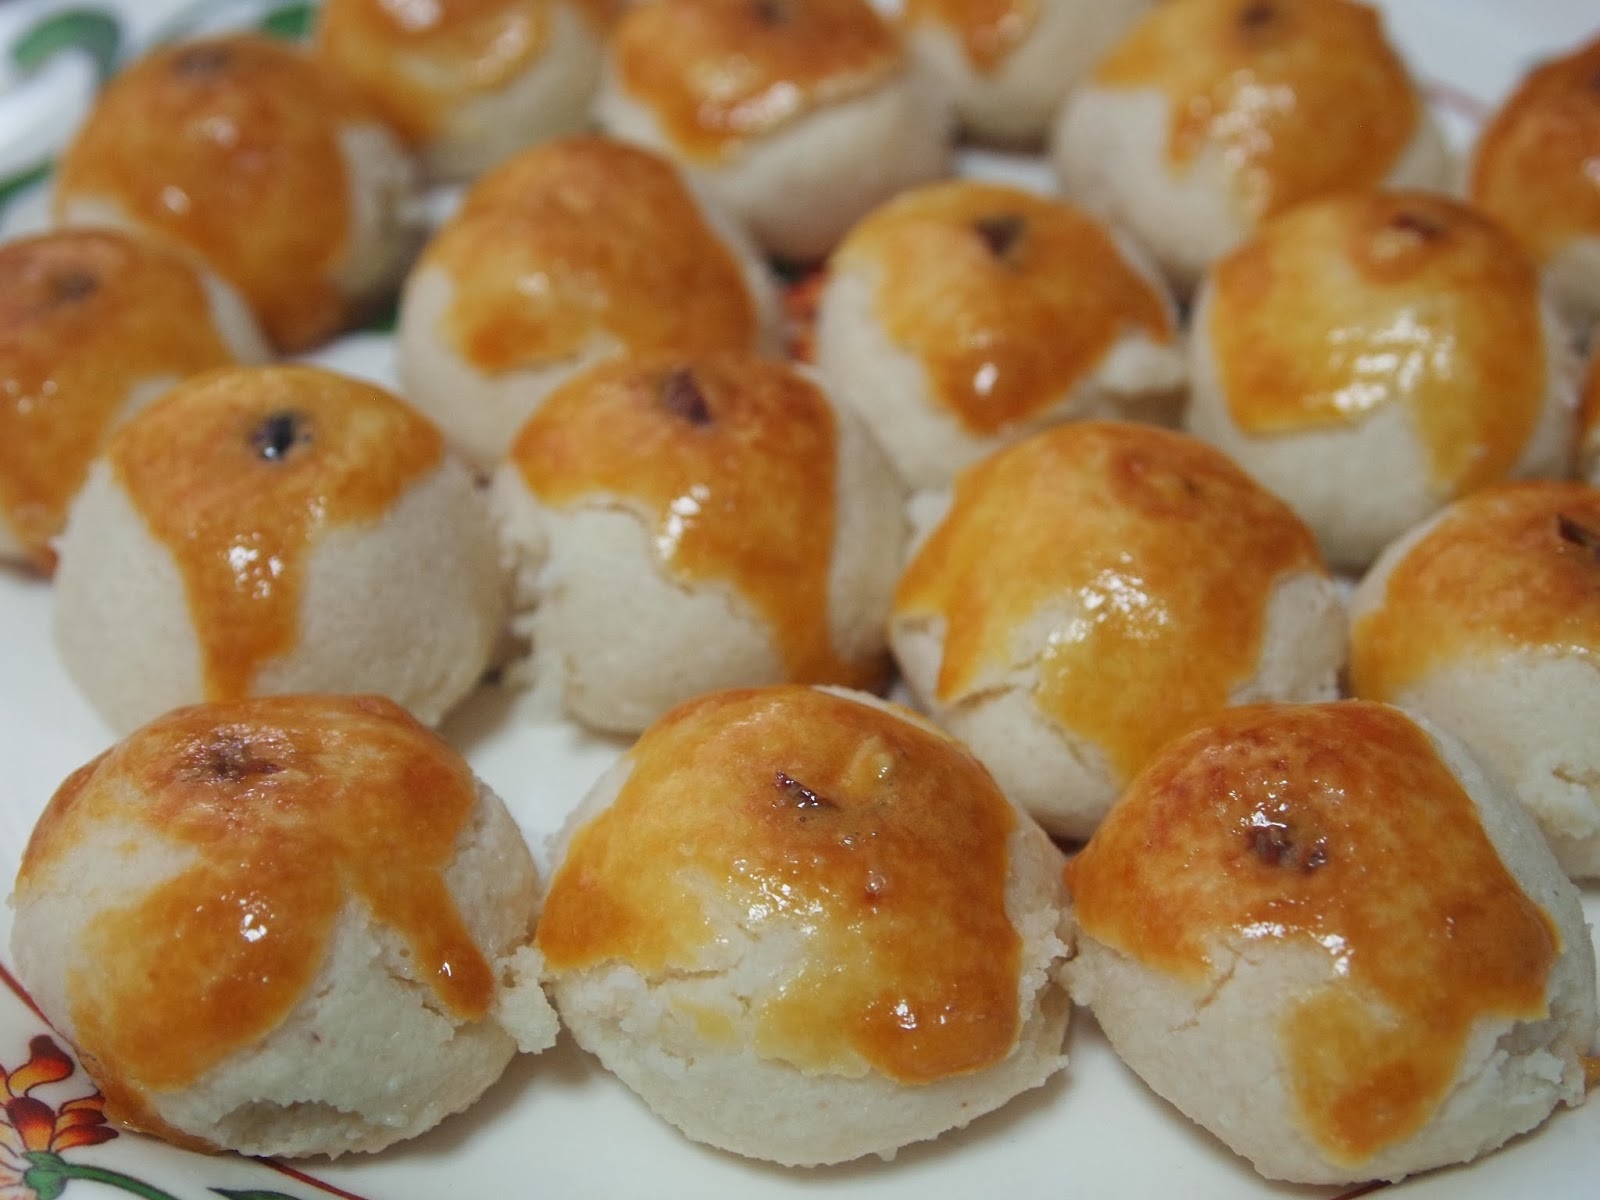
Almond Cookies

Attempted to make Almond cookies this year!
My grandmother used to make this every Chinese New Year and I was hoping that it will taste like hers. Sad to say, it's definitely still lacking something but it doesn't taste too bad either. Not a bad attempt I must say. I will attempt to make another batch next weekend with some minor improvements! Almond cookies are not hard to make, it took me longer because I only had 1 tray to work with. Also I used more oil than I thought I would. The aroma that comes with baking cookies is something that would continue to make me bake! The pictures I took of the cookies make them look really good heh.


Tuesday, 16 July 2013

Nutella cheesecake (No Bake)- Cooking 101

This is a really easy recipe. As I do not have an oven at home, I always look for no bake recipes. This recipe was taken off Nigella. The original recipe has chopped toasted hazelnut but I couldn't find it in the shops near me so I decided to do without it.

All the ingredients used minus the hazelnuts


Ingredients 
- 250g of digestive biscuits
- 500g of cream cheese
- 60g icing sugar
- 75g unsalted butter
- 400g Nutella 

Method
- Break the digestive biscuits into a bowl. (small crumbs. I used my hands to do this and it took very long and I ended up with sore fingers. You can use a food processor) 
- Add butter and 15ml of nutella and mix until it becomes a damp, sandy mixture. (smells really good)
- Tip into a 23cm/9inch round springform and press into the base either using your hands or the back of a spoon. Place in the fridge to chill. (I left it for 1 hour)
- Beat the cream cheese and icing sugar until smooth and then add the remaining Nutella to the cream cheese mixture, and continue beating until combined
- Take the springform out of the fridge and carefully smooth the Nutella mixture over the base.
-  place the tin in the fridge for at least four hours or overnight. Serve straight from the fridge for best results.

Before going into the fridge


Not evenly spread out

The cake layer seems alittle thin

Not evenly spread
 I think this recipe is too sweet for me. It tastes great, just too sweet. I will probably cut the amount of nutella by half! Another success! I probably will get laughed at by seasoned bakers with my horrible baking skills and cake appearance. Don't mind getting feedback to improve myself :D

Saturday, 13 July 2013

Baileys Irish Cream Tiramisu (without raw eggs) - Cooking 101

After having Tiramisu at Poulèt, I was inspired to make my own.
Initially I randomly googled for Tiramisu and I found one with really good rating and reviews. I bought most of the ingredients and then realised that I'm not too comfortable with the idea of raw eggs. So I found another recipe that does not use eggs. The ingredients also requires alcohol like Kahlau, Rum or Tia Maria which I don't have at home and it's quite a waste to buy the whole bottle just for a few table spoons of it. I made do and used Baileys that were available in small bottles.

It was really easy to make! I even went to Ikea to buy a few nice glass bottles like how they do it outside.

All the ingredients used 

Recipe from noobcook:

Ingredients for the cheese layer

- 250g Mascarpone Cheese
- 1tbsp pure vanilla extract
- 2 tbsp caster sugar
- 1 tbsp Kahlau (I used Baileys instead of Kahlau)
- 2 tbsp thickened cream (I used Millac Dairy Whipping Cream with 38% fat dairy cream)
- Cocoa powder
*in the end, I used double the amount for all of the above because i realised that halfway through, I ran out of cheese. I also used half the amount of lady's finger*

Ingredients for Lady's Finger with coffee dip
- 4 tbsp espresso coffee (I randomly bought canned coffee from 7-11 that is not espresso)
- 2 tbsp Kahlau (I used Baileys)
- 200g lady's finger (Savoiardi)
*as for the coffee + Bailey's mixture, you can prepare more when you run out in the process and I only used 100g of lady's finger*

Method
1. Mix mascarpone cheese, pure vanilla extract, caster sugar and Kahlau into a mixing bowl and mix well. 
2. After step 1 has been thoroughly mixed, add the thickened cream and fold the cream into the mixture until a consistent creamy texture. 
3. Prepare the coffee dip by pouring the coffee and Kahlau onto a plate (mix well) and dip the lady's finger into the coffee dip. (do not soak the lady's finger into the dip for too long as it will become too soggy)
4. Put a layer of soaked lady's finger into the container that you are using.
5. Spread a layer of cream mixture prepared in step 2.
6. Repeat steps 4-5. 
7. Dust a layer of cocoa powder using a fine sieve.
8. Leave to chill in the fridge for a few hours. (I left it overnight)


Step 2
End product

Bottles from Ikea

The amount that I made with 500g of mascarpone and 100g of lady's finger

Taste wise I must say it's pretty good! (For my mum to say it's not bad must mean that it's really pretty good :P)The lady's fingers are alittle too soggy because I soaked them in the coffee dip for too long. Will remember to work on that next time round. Haha so proud of myself! The next time I make this, i'll try it with the other alcohols to see how different the taste will be.


Thursday, 11 July 2013

Fried Radish/ Carrot Cake (Cooking 101) 菜头糕

When it comes to cooking/ baking, I have to admit that I am totally at a loss when I want to cook. My family hardly cooks at home because we are always not at home. Once in awhile, I will have the urge to cook something really random. As we hardly cook, there's not much seasoning at home. I have to really buy EVERYTHING (including soy sauce/ oil/ pepper) if I want to cook.

I call this Cooking 101 because it's like cooking for those who really don't know how to cook. I know nothing about cooking so I really follow the recipes that I find. After cooking, learn from the session and figure out what needs to be changed.

Fried Radish/Carrot Cake 菜头糕 came to mind when I was watching the television programme and they were eating that dish. I immediately went to google for a recipe and got all the ingredients.
Here's the recipe:

Ingredients for the cake
- Radish (around 700g)
- 50ml water
- 200g rice flour (white rice)
- 250ml water
- 1/4 tsp salt

Method
1. Grate the radish. Initially I could not find the grater at home so I painstakingly cut the radish with a really small/ pathetic knife.
2. To a stainless steel container, add the grated radish and 50ml of water.
3. Leave to steam at medium heat for 30 minutes until the radish turns translucent. Leave to cool.
4. Premix 200g rice flour,  250ml water and 1/4tsp salt. Mix well.
5. Add the rice flour mixture from step 4 into the stainless steel container containing the grated radish and mix well.
6. Steam mixture on high heat for 40 minutes.
7. After 40 minutes, leave mixture to cool.
8. Cool overnight in fridge.

Remember I said that I had to cut the radish with a knife initially? The batch which was made with that did not turn out as well as the one that I used a grater. The one with the knife had really obvious radish slices and after steaming, the top layer was really watery. Yes please do not use a knife like me. I almost died using the knife.

Obvious radish slices as a result of using a knife


This is what it is supposed to look like after 40 minutes of steaming
I left the cake overnight in the fridge and I loved the smell of radish in my fridge after that! (smell didn't last for very long)

Ingredients for frying the cake
- 1-2 tsp of Chai Poh
- 2-3 eggs (I used more as I really like to eat eggs)
- 3 cloves of minced garlic
- 2 tsp of fish sauce
- 3 tsp vegetable oil
- white pepper
- thick sweet sauce (if you want the black version)

Method
- Cut up the radish cake into small chunks
- Heat oil and fry the small chunks of radish cake until lightly browned and slightly crisp.
- Add minced garlic and chai poh. Fry until aromatic. Add more oil if it's too dry.
- Add fish sauce. Fry to coat evenly.
- Pour eggs over radish cake. All eggs to settle slightly before flipping.
- Add white pepper (up to your own preference)
- Add Chilli (own preference)

Finished product
It doesn't taste like those you have at hawker centres but the cake was pretty good. The amount of cake made from this was enough for 4 people. Just need to work on tweaking some of the ingredients to make it taste better. Mine was a little too salty as I added a lot more fish sauce. Overload of radish cake that day.

First attempt success!